6 Vital Tips for Professional Garden Tool Restoration
The scent of damp earth and the turgor of a healthy leaf define the success of a horticultural season. When a tool fails, the physical connection between the gardener and the rhizosphere is severed. Precision in the field requires equipment that functions as an extension of the hand. Using a repair manual for garden tools ensures that the mechanical integrity of carbon steel and ash wood is maintained to professional standards. Neglecting these implements leads to jagged vascular cuts and increased susceptibility to fungal pathogens.
High quality tools allow for clean incisions that preserve the plant's ability to seal wounds through the production of callus tissue. A dull bypass pruner crushes the xylem and phloem; this prevents efficient nutrient transport and invites opportunistic infections. Restoration is not merely about aesthetics. It is a technical necessity for maintaining the physiological health of a garden. By following a systematic approach to tool maintenance, you ensure that every cut is surgical and every soil penetration is effortless.
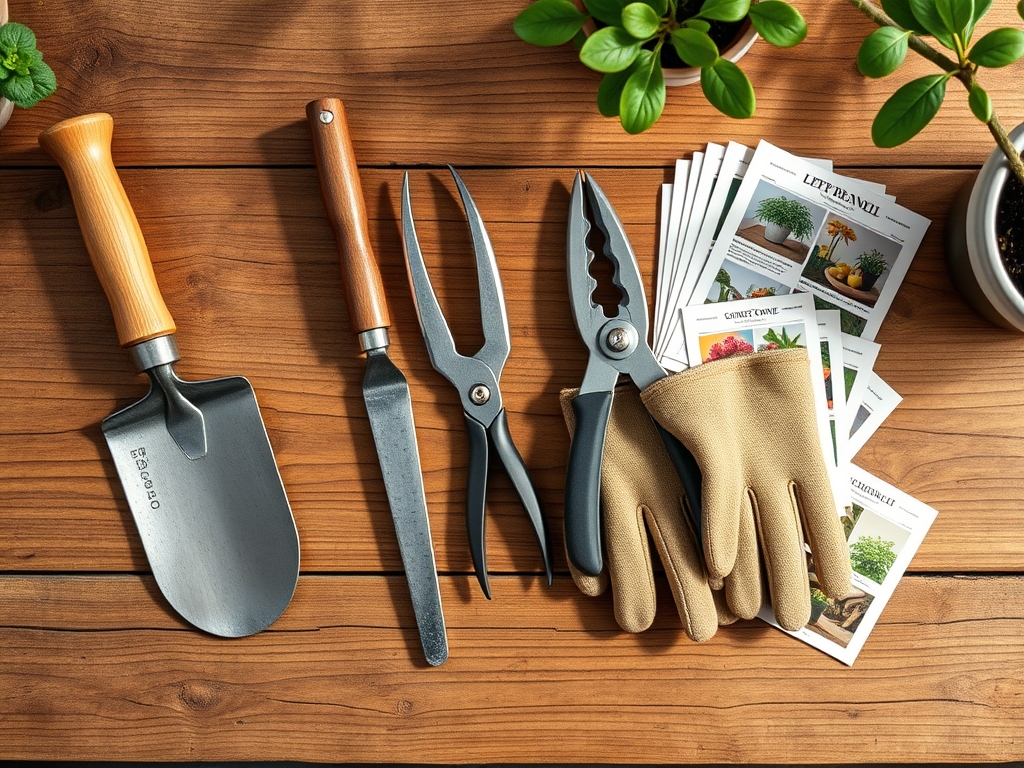
Materials:
Restoring tools often involves preparing the environment where they will be used. Soil quality dictates the rate of tool wear. A **friable loam** with a balanced **Cation Exchange Capacity (CEC) of 15 to 25 meq/100g** provides the least resistance to metal implements. In contrast, heavy clay soils with high bulk density accelerate the dulling of spade edges.
When preparing beds for planting, target a soil pH of 6.2 to 6.8 to optimize nutrient availability. Use a specific NPK ratio of 10-10-10 for general maintenance or 5-10-10 for root development in phosphorus-demanding species. For tool restoration itself, you require 80 to 220 grit sandpaper, grade 0000 steel wool, and boiled linseed oil. For sharpening, a mill file or a medium-grit whetstone is essential to restore the bevel angle of the cutting edge.
Timing:
Tool restoration should occur during the dormant season, typically between the first hard frost and the spring thaw. In Hardiness Zones 5 through 7, this window falls between late November and early March. Performing maintenance during this period ensures tools are ready before the "Biological Clock" of the garden triggers the transition from dormancy to the vegetative stage.
As soil temperatures reach a consistent 50 degrees Fahrenheit (10 degrees Celsius), root activity begins. You must have your hori-hori knife and spades sharpened before this threshold to avoid compacting the soil during early spring transplanting. The timing of tool repair is a precursor to the photoperiod-sensitive growth cycles of your cultivars.
Phases:

Sowing
Before the first seed hits the substrate, the tools used for furrowing must be free of rust and debris. A clean edge on a hoe allows for consistent depth control, which is vital for seeds requiring specific light levels for germination.
Pro-Tip: Maintaining smooth tool surfaces prevents the accidental transfer of soil-borne pathogens. This protects the rhizosphere, the narrow region of soil influenced by root secretions and soil microorganisms, ensuring that young seedlings can establish mycorrhizal symbiosis without competition from harmful fungi.
Transplanting
Transplanting requires a sharp hori-hori knife to slice through circling roots in pot-bound specimens. This mechanical stimulation encourages the production of new lateral roots.
Pro-Tip: Clean cuts on root tissue trigger the release of auxins, which are hormones that promote root initiation. Jagged tears caused by dull tools lead to localized necrosis and slow the establishment of the plant in its new location.
Establishing
Once plants are in the ground, maintenance tools like bypass pruners are used to manage the canopy. Removing lower "sucker" growth on indeterminate tomatoes is a common task that requires sterile, sharp blades.
Pro-Tip: Proper pruning manages auxin suppression. By removing the apical meristem or specific lateral shoots, you redirect the plant's energy toward fruit production or structural strengthening, a process known as modifying apical dominance.
The Clinic:
When tools are neglected, the plants they interact with often show signs of physiological distress. Below are common symptoms and their horticultural solutions.
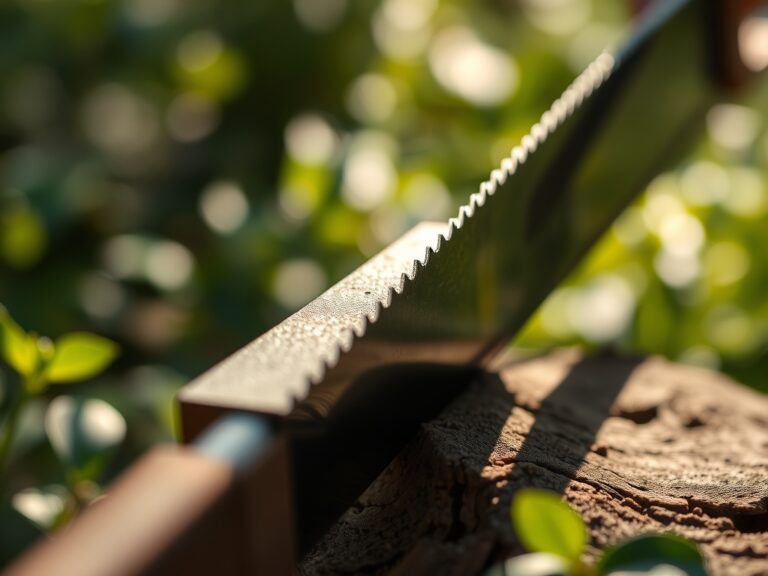
- Symptom: Ragged Leaf Margins. This indicates dull pruning shears that have crushed the tissue rather than slicing it.
- Solution: Sharpen blades to a 20-degree angle using a whetstone and lubricate the pivot point with silicone spray.
- Symptom: Nitrogen Chlorosis. Yellowing of older leaves while veins remain green. This often occurs when soil is too compacted for root expansion.
- Solution: Use a restored, sharp broadfork to aerate the soil to a depth of 12 inches without inverting the soil profile. Apply a high-nitrogen fertilizer with an NPK of 21-0-0.
- Symptom: Iron Deficiency. Interveinal chlorosis in new growth, often caused by high soil pH (above 7.5).
- Solution: Check soil pH with a calibrated soil moisture and pH meter. Amend with elemental sulfur to lower pH to the 6.5 range.
Maintenance:
A professional maintenance schedule prevents the need for total restoration. After every use, wipe metal surfaces with a dry cloth to remove moisture. Apply a thin layer of mineral oil to prevent oxidation. For wooden handles, an annual application of boiled linseed oil prevents splintering and maintains structural integrity.
Irrigation management is equally critical for the longevity of your tools and plants. Provide 1.5 inches of water per week delivered at the drip line to ensure deep root penetration. Use a soil moisture meter to verify that moisture has reached a depth of 6 to 8 inches. Avoid overhead watering to minimize the risk of foliar diseases and to keep your tools dry during use.
The Yield:
Harvesting is the culmination of the horticultural cycle. For leafy greens, harvest in the early morning when turgor pressure is at its peak. This ensures the highest moisture content in the cells. For fruiting bodies like peppers or tomatoes, use a sharp bypass pruner to cut the pedicel; do not pull the fruit, as this can damage the main stem.
Post-harvest handling is critical for "day-one" freshness. Immediately move harvested crops to a cool, shaded area to reduce field heat. For most vegetables, maintaining a storage temperature of 40 to 45 degrees Fahrenheit with high humidity will slow the rate of senescence, the biological aging process, and preserve the nutritional profile of the yield.
FAQ:
How do I remove heavy rust from an old spade?
Use a wire brush or 80-grit sandpaper to remove surface oxidation. For deep pitting, soak the metal in a mild acetic acid solution for 24 hours. Neutralize with water and baking soda; then sharpen and oil the blade immediately.
What is the best oil for wooden tool handles?
Boiled linseed oil is the industry standard. It penetrates the wood grain and hardens to create a water-resistant barrier. Avoid petroleum-based oils, which can degrade the wood fibers over time and cause the handle to become brittle.
How often should I sharpen my bypass pruners?
For professional use, touch up the edge with a diamond file every 4 to 6 hours of active pruning. For home gardeners, a thorough sharpening at the beginning of the season and a mid-season refinement is sufficient.
Can I use a power grinder to sharpen garden tools?
Avoid power grinders as they generate excessive heat that can ruin the temper of the steel. This makes the metal brittle or too soft to hold an edge. Use hand files or whetstones to maintain the integrity of the tool.