6 Steps to Build a Sturdy Wooden Garden Pergola
The scent of freshly cut cedar mingles with soil as you mark the first post hole, measuring tape snapping taut across bare ground. A well-constructed wooden pergola transforms any garden into structured growing space, offering vertical support for climbing roses, grapevines, or wisteria while defining outdoor rooms with architectural precision. Mastering the steps for building a garden pergola requires understanding load distribution, wood selection, and soil compaction as much as aesthetic vision. This guide approaches pergola construction through the lens of horticultural integration, ensuring your structure serves both form and function for decades.
Materials
Pressure-treated pine rated for ground contact (0.60 PCF retention) provides the most economical foundation posts, though naturally rot-resistant western red cedar or black locust offers superior longevity without chemical treatment. For a standard 10-by-12-foot pergola, you will need four 6-by-6-inch posts cut to 10 feet (allowing 24 inches below grade), four 2-by-8-inch beams spanning 12 feet, and eight 2-by-6-inch rafters at 10 feet length. Hardware demands precision: use half-inch galvanized lag bolts (6 inches long) for beam-to-post connections, joist hangers rated for 2-by-6 lumber, and three-inch structural screws for rafter attachment.
The soil interface demands attention comparable to transplanting bare-root stock. Excavate post holes to 24 inches deep and 12 inches diameter, then backfill with a 4-inch gravel base (crushed stone, not pea gravel) to ensure drainage. Mix excavated soil with perlite at a 3:1 ratio to improve compaction without creating hydrophobic pockets. For pergolas supporting heavy vines like mature wisteria (which can exceed 400 pounds), consider a concrete collar extending 8 inches below grade, creating a foundation analogous to mycorrhizal networks supporting deep-rooted oaks. The amendment ratio mirrors a balanced 4-4-4 organic fertilizer: structural integrity, drainage capacity, and lateral stability in equal measure.
Timing
Construction timing follows the same hardiness zone logic as bare-root planting. Zones 6 through 9 permit year-round building, though autumn (September through November) offers ideal soil conditions. The ground remains workable without summer's concrete-like hardness or winter's frost heave risks. In Zones 3 through 5, schedule construction between late May and early October, after the final frost date and before soil temperatures drop below 45 degrees Fahrenheit at 12-inch depth.
Avoid building during active monsoon seasons or prolonged wet periods. Saturated soil cannot achieve proper compaction around posts, leading to settling comparable to transplant shock in bare-root specimens. Wood moisture content should read below 19 percent on a pin-type meter before assembly begins.
Phases

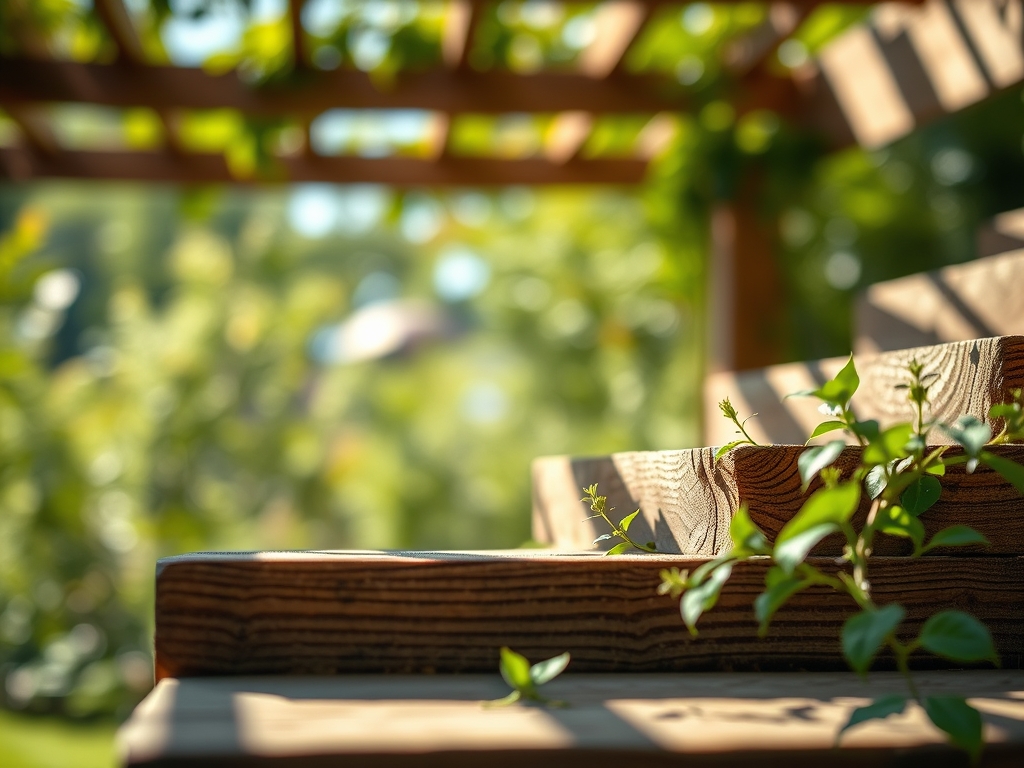
Foundation Phase: Mark corner post locations using the 3-4-5 triangle method (measure 3 feet along one edge, 4 feet along the perpendicular edge, and adjust until the diagonal measures exactly 5 feet). Excavate holes using a clamshell digger or auger, maintaining vertical walls. Set posts with temporary 2-by-4 braces at 90-degree angles, checking plumb with a 48-inch level on two adjacent faces. Backfill in 4-inch lifts, tamping each layer with a steel digging bar. The post should not move more than one-quarter inch in any direction when subjected to 50 pounds of lateral force.
Pro-Tip: Apply copper naphthenate preservative to the bottom 30 inches of untreated posts 48 hours before installation. This creates a fungal barrier analogous to beneficial Trichoderma strains protecting root zones.
Assembly Phase: Once concrete (if used) cures for 72 hours, cut posts to uniform height using a laser level and circular saw. Attach beams using structural-grade lag bolts, pre-drilling pilot holes at 75 percent of the bolt diameter to prevent splitting. Position beams so the crown (natural arch in lumber) faces upward, distributing load like auxin distribution in apical meristem. Rafters should overhang beams by 12 to 18 inches, creating shade patterns similar to canopy layering in mature forests.
Pro-Tip: Sand all edges to a one-eighth-inch radius before final assembly. This prevents water pooling in sharp corners where decay fungi colonize, much like removing damaged tissue during rose pruning.
Finishing Phase: Apply exterior-grade penetrating oil finish within 30 days of construction. Raw wood absorbs moisture at rates comparable to peat moss, accelerating decay. Choose tung oil or linseed oil formulations that allow vapor transmission while repelling liquid water. Reapply annually in spring, before new vine growth obscures structural elements.
Pro-Tip: Install copper flashing strips along the top surface of beams. Copper ions leach during rain events, inhibiting moss and algae colonization through the same oligodynamic effect that makes copper fungicides effective against downy mildew.
Troubleshooting
Symptom: Posts lean after first winter, similar to frost-heaved perennials.
Solution: Excavate around affected post to 18 inches depth. Add 6 inches of crushed stone, recompact, and install a diagonal knee brace from post to beam.
Symptom: Beam sag under load, exceeding one-quarter inch deflection per foot of span.
Solution: Sister an additional 2-by-8 alongside existing beam using construction adhesive and half-inch through-bolts every 24 inches. This mimics the structural redundancy in compound leaf architecture.
Symptom: End grain checking (cracks) wider than one-eighth inch on post tops.
Solution: Cut posts at 15-degree angles to shed water, or cap with copper post caps. Seal existing checks with exterior wood filler containing boron preservatives.
Symptom: Powderpost beetle frass (fine sawdust) accumulating below rafters.
Solution: Inject borate solution into exit holes using a syringe. Surface-applied boron penetrates one-quarter inch during active wood moisture movement in spring.
Symptom: Black rot spreading from ground contact points upward.
Solution: Excavate soil 6 inches from post base. Remove decayed wood to sound material, treat with copper naphthenate, and install a gravel collar to improve air circulation at the soil-wood interface.
Maintenance
Inspect all connections biannually, tightening lag bolts one-quarter turn if looseness develops. Wood shrinks perpendicular to grain as it seasons, creating gaps in connections similar to soil shrinkage during drought. Apply penetrating oil finish each April, using 4 ounces per 10 square feet of surface area. Brush away debris accumulation from beam-rafter joints monthly during the growing season. Organic matter holds moisture against wood like mulch retains soil moisture, but here it accelerates decay rather than supporting growth.
Prune climbing plants to maintain 6 inches clearance from post-ground interface. This airflow zone prevents bark retention and moisture concentration. Remove any vine tendrils wrapping posts in complete circles; their constriction mimics girdling roots on nursery stock, eventually crushing wood fibers as plants mature. Repaint or reseal cut ends immediately if you modify the structure; exposed end grain absorbs water at 10 times the rate of face grain.
FAQ
How deep should pergola posts be set?
Bury posts to one-third their total height, minimum 24 inches in frost-free climates and 36 inches where frost depth exceeds 18 inches. This ratio matches the root-to-shoot proportion in established woody perennials.
What wood species resists rot best without treatment?
Black locust and white oak contain natural extractives comparable to plant secondary metabolites, offering 25-plus year ground-contact longevity. Old-growth redwood follows, though availability remains limited.
Can I skip concrete for post installation?
Yes, in well-draining soils with high sand content (over 60 percent). Use tamped gravel backfill and cross-bracing. Clay soils with cation exchange capacity above 20 meq/100g require concrete to prevent seasonal movement.
How do I prevent carpenter bees from boring into rafters?
Paint or stain all surfaces. Carpenter bees prefer untreated, unpainted softwood. Fill existing holes with steel wool and wood filler, then apply surface finish immediately.
What rafter spacing works best for shade and vine support?
Sixteen inches on center provides 60 percent shade density while supporting 50 pounds per linear foot (adequate for mature grape or clematis). Wider spacing suits arid climates where maximum light penetration benefits understory plantings.